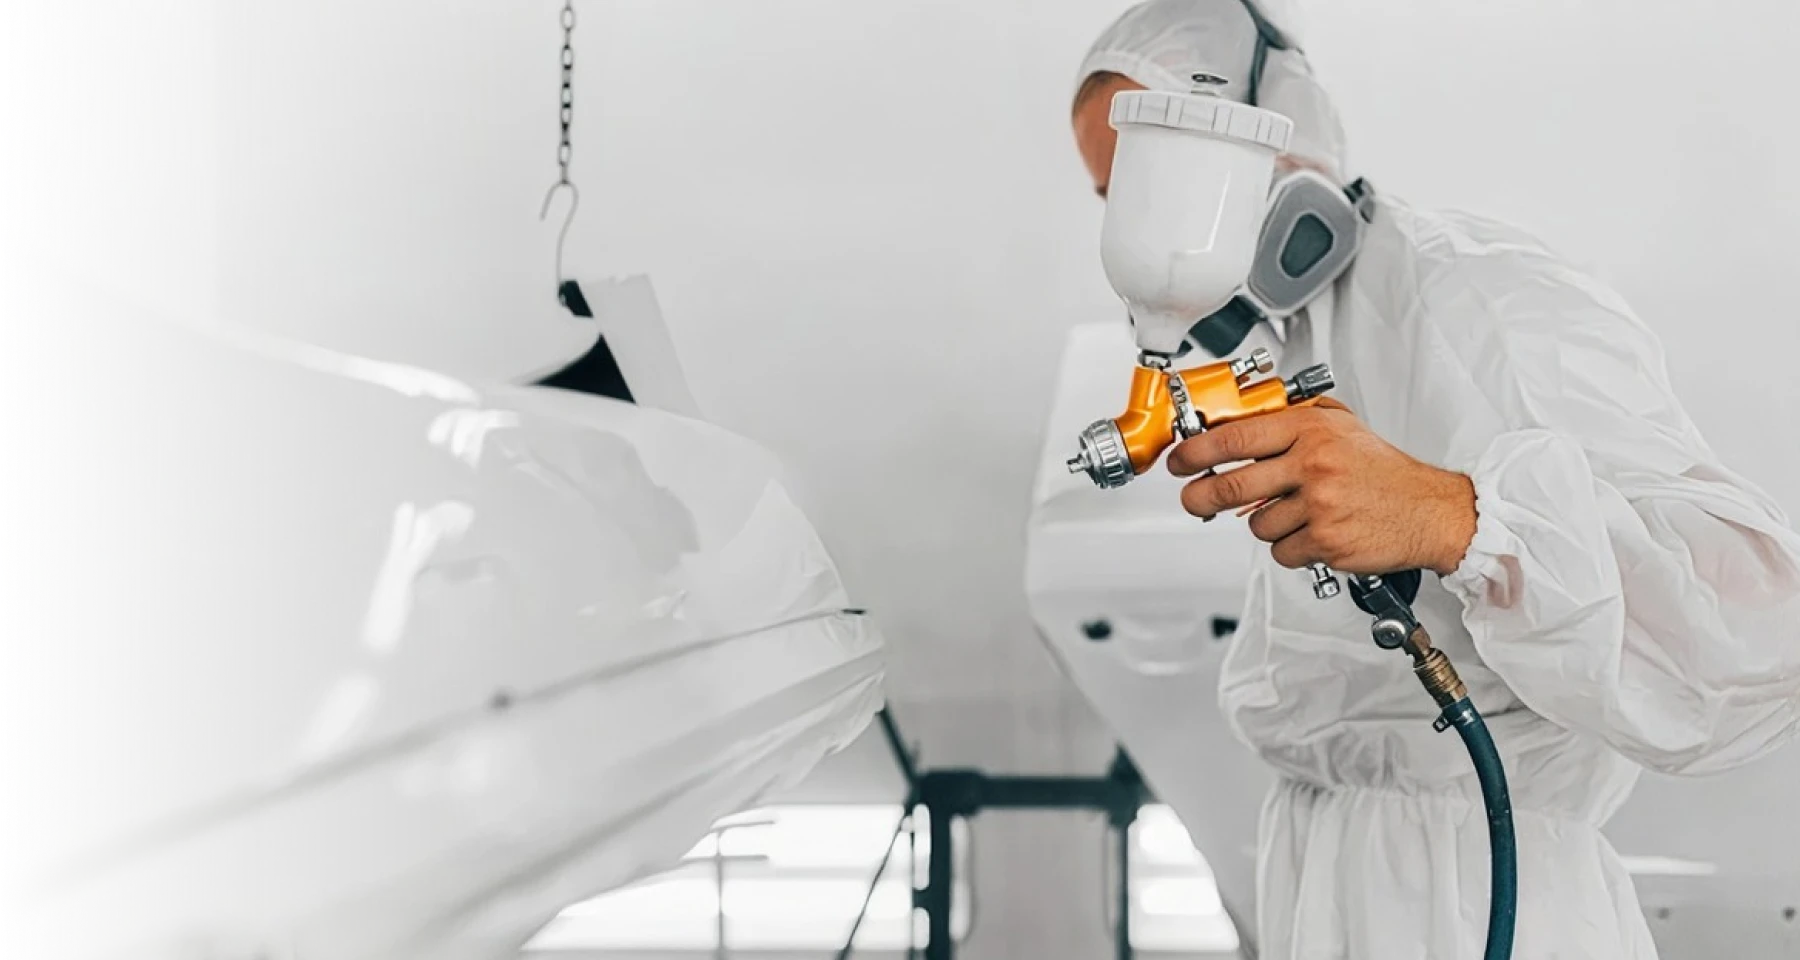
Gloris 2K MS automotive clear coat, 5L kit, features high gloss, high hardness, fast drying, excellent leveling and polishability for automotive spot repair, panel refinishing and full vehicle repaint.
2K Medium Solid Clear Coat 1100 - 5L Kit

Product Description
Product Applications
Suitable for automotive refinishing including spot repair, panel repair, and complete re-spray. Ideal for partial body refinishing and large vehicle applications. Compatible with professional body shop environments, air-dry conditions, and bake curing systems.
Available Types
- Fast Dry Grade: 2K Clear Coat + 100F Fast-Dry High Performance Hardener
- Standard Grade: 2K Clear Coat + 100S Standard High Performance Hardener
- Slow Dry Grade: 2K Clear Coat + 100R Slow-Dry High Performance Hardener
Packaging
Clear Coat: 5 L + Hardener: 2.5 L
MOQ
20 Sets
 Wholesale or Distribution
 Technical details
Product Type
5L Set 鹦鹉® Gloris 2K MS Clear Coat 1100
Application
Automotive Refinishing & Industrial Coatings
Features
High Gloss, Excellent Leveling, High Hardness, Fast Drying, Corrosion Resistance
Resin System
Acrylic Polyurethane
Mixing Ratio
Clear Coat: Hardener: Thinner = 2: 1: 10%-30%
Drying Time
Dust Free: 25 min / Sandable: 12 h (23°C)
Application Conditions
Temperature ≥ 5°C; Relative Humidity ≤ 85%
Theoretical Coverage
Approx. 3–5 m²/L (2–3 coats)
VOC
≤ 480 g/L
Color
Clear
Storage
Flammable. Store in a cool, dry place away from heat and open flames.
Shelf Life
24 Months
Industry pain points
- Poor Durability:Insufficient hardness, peeling, flaking, yellowing, gloss loss, and excessive VOC emissions.
- Unstable Application Orange peel, pinholes, whitening, slow curing, and high environmental requirements.
- High Overall Cost Inconsistent product quality, frequent rework, and excessive material waste.
- After-Sales Risks Unstable supply, limited technical guidance, and insufficient sales support.

Product Features
1. Compatible with Mainstream Market Primers
Compatible with leading automotive basecoat systems including Axalta Cromax, Spies Hecker, PPG, AkzoNobel Sikkens, BASF, Nippon, and Sherwin-Williams.

2. Excellent Performance
This automotive clear coat, when used with matched hardener and thinner, delivers:
- High gloss
- High hardness
- Fast drying
- Excellent flow
- Superior polishability

3. Wide Application Range
Suitable for:
- Spot Repair
- Panel Repair
- Overall Repair
- Full Body Refinishing
- Large Vehicle Applications

4. Suitable for Multiple Application Conditions
Designed for professional use in:Bodyshop Conditions, Air-Dry Conditions,Bake Curing Systems.
Ultra Fast / Fast / Standard / Slow Dry Clear Coat Sanding Time Comparison Table
| Clear Coat Type | Sanding Time at 20℃ | Sanding Time at 60℃ |
|---|---|---|
| Ultra Fast Dry | 30-40 min | 10 min |
| Fast Dry | 3-6 h | 30 min-1 h |
| Standard | 6-12 h | 1-1.5 h |
| Slow Dry | 12-24 h | 1.5-2 h |
For Wholesalers & Distributors
Gloris supplies complete automotive refinishing solutions to wholesalers and distributors worldwide. Our product range covers abrasive sanding discs, body filler, clear coats, window films and PPF. We deliver consistent, high-quality products with reliable supply to help partners grow their automotive repair business.
Related Insights


FAQ
Common Automotive Painting Problems – Part 1: How to Effectively Prevent and Fix Paint Sagging
1. What Is Paint Sagging in Automotive Painting?
Sagging (also called running) refers to a paint defect that occurs during automotive painting when the coating is applied too thickly or unevenly. Under the force of gravity, the automotive paint flows downward instead of remaining evenly distributed on the vehicle surface, resulting in visible streaks, runs, or tear-shaped marks.
Sagging can occur when applying basecoat, primer, or clear coat. It not only affects the appearance of the painted surface but can also result in uneven film thickness and affect the overall performance of the coating.

2. Characteristics of Paint Sagging
-
Visual Appearance
Visible flow marks, streaks, or lines appear on the painted surface, typically showing as downward-running paint.
-
Surface Feel
The surface becomes uneven, and areas with excessive coating buildup may be noticeable by touch.
-
Where It Occurs
Sagging generally occurs on vertical or inclined surfaces, where gravity causes the paint to run downward.
3. Causes of Paint Sagging
-
Excessive Coating Thickness
Applying the coating too heavily in a single pass can prevent the surface from drying evenly, causing the paint to flow downward.
-
Spray Gun Held Too Close to the Surface
When the spray gun is held too close to the surface, too much paint is concentrated in a small area, resulting in excessive film thickness and potential sagging.
-
Spray Gun Movement Too Slow
Moving the spray gun too slowly can cause excessive paint buildup in certain areas, increasing the risk of sagging.
-
Excessive Thinning
If the thinner/reducer ratio is not appropriate, the coating may become too thin and fluid, increasing its tendency to sag.
-
Improper Spray Environment
A low application temperature or insufficient ventilation can slow the evaporation and drying of the coating. Excessive solvent vapor in the spray environment may also keep the coating wet for longer, increasing the risk of sagging.
-
Incorrect Spray Gun Settings
Using an unsuitable spray gun, an excessively large nozzle, low air pressure, an overly narrow spray pattern, or excessive fluid output can all contribute to sagging.
-
Insufficient Surface Degreasing
If the paint cannot properly adhere to the substrate, coating defects such as sagging may occur.
Applying paint over contaminated or oily surfaces, or over a smooth, unprepared old paint film, can also increase the risk of runs. Therefore, the surface should be thoroughly cleaned before painting, and smooth existing paint surfaces should be properly sanded.

4. How to Prevent Paint Sagging
-
Control Coating Thickness
Apply each coat evenly and avoid applying the coating too heavily in a single pass.
-
Maintain the Proper Spray Distance
Keep an appropriate distance between the spray gun and the surface, typically around 15–20 cm.
-
Maintain a Consistent Spray Gun Speed
Move the spray gun evenly at a suitable speed and avoid staying in one area for too long.
-
Follow the Recommended Mixing Ratio
Follow the manufacturer's recommended mixing and thinning ratio to maintain the appropriate viscosity and flow characteristics of the coating.
-
Control Application Conditions
Apply the coating under suitable temperature and humidity conditions. An application temperature of around 20–25°C is generally recommended.
-
Adjust Spray Gun Settings
Regularly check and adjust the spray gun to ensure that the nozzle size and air pressure are suitable for the coating being used.
5. How to Fix Paint Sagging
-
Sanding and Polishing
For minor sagging, fine-grit sandpaper such as 1500–2000 grit can be used to carefully level the affected area. The surface can then be polished to restore a smooth finish.
-
Spot Repair
For more severe sagging, the affected area may need to be sanded back and then repaired by localized repainting.
6. Choosing Parrot® Gloris Clear Coat Means More Than Choosing a Product – It Also Means Professional Technical Support
During automotive painting, defects such as sagging, orange peel, pinholes, whitening, and slow drying are not necessarily caused by the clear coat itself. Mixing ratios, spray gun settings, spray distance, film thickness, spray gun speed, and application conditions can all affect the final coating performance.
Therefore, for auto body shops and professional painters, choosing a clear coat is not only about its gloss, hardness, drying speed, and durability. The ability of the supplier to provide ongoing technical support is equally important.
Parrot® Gloris not only provides automotive refinishing clear coat products, but also provides product application support and technical guidance to our distributors, their downstream customers, and end users.
When customers encounter sagging or other application problems, we can work with them based on the specific product model, application process, spray gun settings, mixing ratio, and actual application conditions to help identify the possible causes and provide appropriate adjustment recommendations.
Our Technical Support Can Help Customers:
- Understand the correct product mixing ratios and application procedures
- Adjust application parameters according to different working conditions
- Optimize spray gun settings, spray distance, and spray gun movement speed
- Reduce common application defects such as sagging, orange peel, and pinholes
- Analyze actual application problems and provide practical technical solutions
- Provide product application support for distributors' downstream body shops and end users
Common Automotive Painting Problems – Part 2: How to Prevent Orange Peel
1. What Is “Orange Peel” in Automotive Painting?
In automotive refinishing, “orange peel” refers to an uneven surface texture that develops after paint or clear coat is sprayed and dried, resembling the surface of an orange. This uneven texture reduces the smoothness and gloss of the paint finish, affecting the overall appearance and perceived quality of the vehicle.

2. What Causes Orange Peel?
2.1 Improper Spray Gun Pressure
If the spray gun pressure is too low, the paint may not atomize properly. Larger paint droplets can result, making it difficult for the coating to distribute evenly across the surface and increasing the risk of orange peel.
Solution: Adjust the spray gun pressure according to the paint manufacturer's recommended range.
2.2 Paint Viscosity Is Too High
When the paint viscosity is too high, its flow and leveling properties are reduced. As a result, the coating may not flow out properly after application, leading to an uneven surface texture.
Solution: Use the appropriate thinner or reducer to adjust the paint viscosity to the recommended spraying viscosity.
2.3 Incorrect Spray Distance and Speed
If the spray gun is held too far from the surface or moved too quickly, paint droplets may partially dry before reaching the panel. This prevents the coating from flowing and leveling properly.
Solution: Maintain the appropriate spray distance and gun speed. A typical spray distance is around 15 cm, helping ensure that the paint remains sufficiently wet when it reaches the surface and can flow out evenly.
2.4 Uneven or Excessively Fast Drying
If solvents evaporate too quickly or the spray booth temperature is too high, the surface of the coating may dry too quickly while the underlying layer has not yet leveled properly. This can result in an uneven surface.
Solution: Select the appropriate solvent and thinner combination, and control the temperature and humidity of the spraying environment.

2.5 Poor Surface Preparation
A rough, contaminated, or inadequately prepared substrate can also prevent the coating from flowing and adhering evenly, resulting in an orange peel texture.
Solution: Make sure the substrate is smooth, clean, and properly prepared. Sand and clean the surface when necessary.
2.6 Improper Equipment Setup or Calibration
Using an inappropriate spray nozzle, air cap, or fluid needle for the coating, or failing to properly set up and calibrate the spray gun, can also result in poor spray performance.
Solution: Select the appropriate spray equipment and components according to the type of coating, and regularly check and calibrate the spray gun.
2.7 Paint Formulation Issues
An incorrect ratio of hardener or additives, or incompatibility between different components, may also contribute to orange peel.
Solution: Strictly follow the paint manufacturer's recommended mixing ratios for hardeners, reducers, and other additives.
3. How Can Orange Peel Be Prevented After Spraying?
3.1 Adjust the Spray Gun Pressure
Make sure the spray gun pressure is within the range recommended by the paint manufacturer. Insufficient pressure can result in poor atomization, larger droplets, and an uneven coating.
Recommendation: Regularly check and calibrate the spray gun to ensure the correct spraying pressure.
3.2 Optimize Paint Viscosity
Paint viscosity that is too high or too low can affect the spraying and leveling performance. Adjust the reducer ratio according to the spraying environment, such as temperature and humidity, and the type of coating to achieve the appropriate application viscosity.
Recommendation: Use a viscosity cup to measure the paint viscosity and ensure it is within the recommended range.
3.3 Control Spray Distance and Gun Speed
Holding the spray gun too far from the panel or moving it too quickly can cause paint droplets to partially dry before reaching the surface, preventing proper flow and leveling.
Recommendation: Maintain a spray distance of approximately 15–20 cm from the surface and move the spray gun at a consistent and controlled speed.
3.4 Choose the Appropriate Spray Nozzle and Equipment
An incorrect nozzle size or air cap can also contribute to orange peel. Make sure the nozzle size is compatible with the coating to avoid excessive material application or poor atomization.
Recommendation: Select the appropriate spray gun configuration according to the coating type and viscosity, and use the nozzle size recommended by the coating manufacturer.
3.5 Control Environmental Conditions
Temperature and humidity have a significant impact on coating drying and leveling. Excessively high temperatures can cause the surface to dry too quickly, while unsuitable humidity levels may affect the coating's ability to flow and level properly.
Recommendation: Maintain a stable spray booth temperature of approximately 20–25°C and a relative humidity of around 50–70%.
3.6 Proper Surface Preparation
The substrate must be smooth, clean, and free from oil, dust, and other contaminants to ensure uniform coating adhesion and leveling.
Recommendation: Thoroughly clean the substrate before spraying and carry out the necessary sanding and dust removal.
3.7 Select the Appropriate Solvents and Additives
Different solvents have different evaporation rates, while additives can affect the flow, leveling, and drying characteristics of the coating. Improper selection or use of solvents and additives may contribute to orange peel.
Recommendation: Strictly follow the coating manufacturer's recommendations when selecting and using solvents, reducers, and additives.
3.8 Apply Multiple Coats and Allow Proper Flash‑Off Time
When applying multiple coats, each layer should be given sufficient flash‑off time. This helps prevent excessive solvent entrapment or uneven drying between coating layers.
Recommendation: Follow the manufacturer's recommended flash‑off time and avoid applying subsequent coats too quickly or waiting excessively long between coats.
3.9 Technical Training and Standardized Application Procedures
Proper spray technique and standardized application procedures are also essential for preventing orange peel.
Recommendation: Provide regular training for paint technicians to ensure correct spraying techniques and consistent application procedures.
By carefully controlling these factors, the risk of orange peel can be significantly reduced, resulting in a smoother and higher‑gloss automotive paint finish.
4. How Can Orange Peel Be Corrected After It Occurs?
When orange peel has already developed after spraying, the uneven surface texture can still be improved or removed through several corrective methods. The appropriate solution depends on the severity of the orange peel and the condition of the coating.
4.1 Polishing
Mild orange peel can sometimes be improved through polishing. Polishing helps smooth the surface and restore gloss.
Steps:
- Use fine‑grit sandpaper, such as 2000 grit or finer, to lightly sand the surface and remove minor surface irregularities.
- Use polishing compound and a polishing machine to refine the surface until the finish becomes smooth and glossy.
Precautions: Avoid excessive sanding or polishing, as this may damage the clear coat or underlying coating layers.
4.2 Sanding and Repainting
For more severe orange peel, sanding and repainting may be required to completely remove the uneven surface texture.
Steps:
- Sand the affected area with medium‑ to fine‑grit sandpaper, such as P800–P1500, until the surface is sufficiently smooth and level.
- Clean the sanded surface thoroughly to remove dust, oil, and other contaminants.
- Reapply one or more coats of paint or clear coat evenly, following the correct application procedure to prevent orange peel from recurring.
Precautions: Allow sufficient flash‑off time between coats and avoid excessive film build.
4.3 Spot Repair
If orange peel is limited to a small area, localized sanding and repainting can be performed instead of refinishing the entire panel.
Steps:
- Sand and clean the affected area.
- Reapply the same or compatible coating using the appropriate application technique, blending the repaired area smoothly into the surrounding finish.
Precautions: Ensure proper color matching with the surrounding area and use suitable blending techniques to achieve a seamless repair.
4.4 Using a Leveling Agent
Leveling agents can improve the flow and leveling properties of a coating and help reduce the risk of orange peel. In some coating systems, an appropriate leveling additive may be incorporated into a subsequent coat when permitted by the coating manufacturer's formulation guidelines.
Steps:
- Add the recommended amount of leveling agent to the coating used for the subsequent application.
- Reapply the coating using the appropriate spraying technique to improve surface leveling.
Precautions: The dosage of the leveling agent must be determined according to the coating system and the manufacturer's recommendations.
4.5 Combining Dry and Wet Sanding
For severe orange peel, dry sanding can first be used to remove major surface irregularities, followed by finer wet sanding to achieve a smoother finish.
Steps:
- Use dry sandpaper, such as P800, to level the coarse orange peel texture.
- Use wet sandpaper, such as P1500–P3000, for finer surface refinement.
- Clean the surface and proceed with polishing to restore the gloss.
Precautions: During wet sanding, avoid excessive pressure and heat buildup that could damage the clear coat.
4.6 Use High‑Quality Polishing Compounds and Tools
High‑quality polishing compounds and professional polishing tools can remove mild surface imperfections more efficiently and restore smoothness and gloss.
Recommendation: Select a polishing compound suitable for the coating system and use a professional polishing machine, such as a dual‑action (DA) polisher, for the finishing process.
The appropriate correction method depends on the severity of the orange peel. Mild orange peel may be improved through polishing and light sanding, while severe orange peel may require more extensive sanding and refinishing. Regardless of the method used, each step should be performed carefully to avoid introducing additional surface defects.
5. Choosing Parrot® Gloris Clear Coat Means More Than Choosing a Product – It Also Means Professional Technical Support
During automotive painting, defects such as sagging, orange peel, pinholes, whitening, and slow drying are not necessarily caused by the clear coat itself. Mixing ratios, spray gun settings, spray distance, film thickness, spray gun speed, and application conditions can all affect the final coating performance.
Therefore, for auto body shops and professional painters, choosing a clear coat is not only about its gloss, hardness, drying speed, and durability. The ability of the supplier to provide ongoing technical support is equally important.
Parrot® Gloris not only provides automotive refinishing clear coat products, but also provides product application support and technical guidance to our distributors, their downstream customers, and end users.
When customers encounter sagging or other application problems, we can work with them based on the specific product model, application process, spray gun settings, mixing ratio, and actual application conditions to help identify the possible causes and provide appropriate adjustment recommendations.
Our Technical Support Can Help Customers:
- Understand the correct product mixing ratios and application procedures
- Adjust application parameters according to different working conditions
- Optimize spray gun settings, spray distance, and spray gun movement speed
- Reduce common application defects such as sagging, orange peel, and pinholes
- Analyze actual application problems and provide practical technical solutions
- Provide product application support for distributors' downstream body shops and end users
Common Automotive Painting Problems – Part 3: How to Prevent Primer Shrinkage?
1. What Causes Primer Shrinkage?
Primer shrinkage is commonly associated with solvent evaporation, excessive film build, improper drying conditions, and application practices. Understanding the causes is the first step toward preventing coating defects.
1.1 Excessively Fast Solvent Evaporation
During application and drying, primer undergoes solvent evaporation and film curing.
Using a solvent that is unsuitable for the application conditions, or spraying in excessively high temperatures or strong airflow, can cause the surface to dry too quickly while the underlying film is still releasing solvent and curing. This may result in an unstable film.
Therefore, select the appropriate thinner according to the product specifications and actual application conditions, and avoid forcing the drying process in high-temperature or excessively ventilated environments.

1.2 Excessive Film Build
Applying primer too heavily in a single application is a major risk factor for shrinkage.
When the primer film is too thick, solvents require more time to evaporate from the underlying layers. If the surface dries too quickly while the underlying film continues to release solvent, the coating may subsequently shrink or sink.
Therefore, follow the recommended film thickness and application instructions in the product technical data. Avoid excessive film build simply to achieve higher hiding power.
Thin coats, multiple passes, and adequate flash-off generally provide more stable results than one heavy coat.
1.3 Improper Drying Conditions
Temperature, humidity, and airflow all affect primer drying.
Low temperatures can slow drying and curing, while excessive temperatures or strong airflow can cause the surface to dry too quickly.
If sanding, recoating, or moving to the next application stage before the underlying primer has adequately dried, continued solvent evaporation and curing may increase the risk of shrinkage.
Therefore, maintain the recommended application conditions and allow sufficient drying time according to the product specifications.
2. How to Prevent Primer Shrinkage?
Preventing primer shrinkage requires control across multiple stages, including product selection, mixing ratio, application technique, environmental conditions, and drying time.
2.1 Choose the Right Product
- Primer Selection
Choose a stable, high-quality primer designed for automotive refinishing systems.
Different primers have different curing characteristics, application requirements, and environmental tolerances. Select the appropriate product based on the repair area, substrate, application conditions, and subsequent paint system.
For larger repair areas, pay particular attention to the primer's drying performance, adhesion, sanding properties, and film stability.
- Strictly Follow the Mixing Ratio
For two-component primers, always follow the manufacturer's recommended mixing ratio.
Do not adjust the mixing ratio on your own to accelerate drying, reduce viscosity, or extend coverage.
Incorrect mixing ratios can affect curing, film performance, and application stability.

2.2 Control Film Build
- Apply Multiple Thin Coats
Compared with applying a heavy coat in a single pass, multiple thin coats provide better control over film build.
Allow sufficient flash-off between coats according to the product specifications before applying the next coat.
This allows the film to build gradually and reduces the risk of uneven drying and subsequent shrinkage caused by excessive film build.
- Avoid Localized Film Build-Up
Areas such as edges, recessed sections, and filler repairs are particularly prone to localized film build-up when the operator repeatedly sprays to improve coverage.
Pay close attention to spray gun movement, spray distance, and overlap to maintain a uniform film.
2.3 Use Wet-on-Wet Application Correctly
Where permitted by the product specifications, wet-on-wet application can be used appropriately.
Wet-on-wet application can reduce unnecessary sanding and application steps while improving overall workflow efficiency.
However, wet-on-wet does not mean continuously applying heavy coats. Different products have specific requirements for flash-off time, film build, and recoating.
The right product + the correct mixing ratio + the correct flash-off time are essential for a stable wet-on-wet process.
3. Application Conditions Also Matter
3.1 Control Temperature and Humidity
Automotive refinishing should be carried out within the temperature and humidity ranges recommended for the product.
Low temperatures may result in:
-
Slower drying
-
Insufficient solvent evaporation
-
Longer curing time
Excessive temperatures may result in:
-
Premature surface drying
-
Reduced flow and leveling
-
Uneven drying between the surface and underlying film
Therefore, select the appropriate product and application parameters according to actual conditions.
3.2 Maintain Proper Airflow
Good ventilation helps solvent evaporate from the application area. However, excessive airflow directly across the wet film can cause the surface to dry too quickly.
Maintain adequate airflow in the spray booth or application area rather than assuming that stronger airflow always produces better results.
4. Do Not Overlook Drying and Curing Time
4.1 Follow the Recommended Drying Time
After primer application, allow the coating to dry according to the time specified in the product technical data.
Do not move to the next application stage prematurely simply to shorten the repair time.
For heavy film builds, low-temperature conditions, or large repair areas, the primer may require additional time to dry and cure thoroughly.
4.2 Do Not Judge Dryness by Surface Feel Alone
A primer surface that feels dry does not necessarily mean that the entire film has fully stabilized.
If solvent is still evaporating or the underlying film is still curing, premature sanding or topcoating may result in further film movement or shrinkage.
Before proceeding to the next stage, consider both the specified drying time and the actual condition of the film.
5. Proper Substrate Preparation Is Essential
Primer shrinkage is not necessarily caused by the primer itself.
If substrate preparation is inadequate—for example, uneven filler work, unstable existing paint, insufficient sanding, or surface contamination—repair outlines, sanding scratches, and other underlying defects may reappear after refinishing.
Before applying primer, ensure proper:
-
Surface cleaning and degreasing
-
Filler preparation
-
Edge feathering
-
Sanding
-
Dust removal
Proper substrate preparation is the foundation for a stable, high-quality refinishing result.
6. Gloris Provides Professional Technical Support
Coating defects during automotive refinishing are not necessarily caused by the product alone.
Product selection, mixing ratio, spray gun settings, spray distance, film build, application speed, and environmental conditions can all affect the final finish.
For professional automotive refinishing products, stable product supply is only the foundation. Ongoing technical support and application guidance are equally important.
Gloris provides product application and technical support to distributors and their downstream customers. When customers encounter primer shrinkage, sagging, orange peel, pinholes, or other application issues, we can assess the actual application conditions and provide practical solutions.
Want to learn more about Gloris automotive refinishing products and technical solutions? Contact our professional team.
Common Automotive Painting Problems – Part 4: Paint Film Blistering
Paint film blistering is a common coating defect in automotive refinishing. It occurs when moisture, oil, or other contaminants become trapped within the coating or at the interface between the substrate and paint film. During vehicle service, changes in ambient temperature and humidity can cause trapped moisture vapor to expand, pushing the paint film outward and forming blisters.

1. Causes of Paint Film Blistering
1.1 Residual moisture and contaminants on the substrate
Insufficient drying after sanding sheet-metal parts, water trapped in substrate gaps and sanding scratches, or damp metal substrates can all cause blistering. Moisture sealed beneath the coating may lead to blisters when the panel is subsequently exposed to heat.
1.2 Water and oil contamination in compressed-air lines
Blistering can result when compressor or air-receiver tanks are not drained regularly, an air dryer malfunctions, or an oil-water separator is poorly maintained. Oil and moisture carried by compressed air can enter the paint film during spraying and become trapped, making this a frequent cause of widespread blistering.
1.3 Inadequate surface cleaning
Sanding dust and abrasive particles left on panels, as well as sweat or grease transferred by bare-hand contact, can become trapped beneath the topcoat or clear coat and trigger blistering later.
1.4 A common high-risk situation
Applying body filler or primer directly after wet sanding without thorough drying can trap moisture in sanding scratches and contribute to delayed blistering.
2. Preventive Measures for Paint Film Blistering
2.1 Inspect the complete compressed-air supply system regularly
Drain accumulated water from air-receiver tanks daily. Check oil-water separators and air dryers to ensure the compressed air is clean and dry. Before painting, purge the spray gun and air line to remove any residual water.
2.2 Prefer dry sanding for body filler
Use dry sanding to reduce moisture entering the substrate. If wet sanding is unavoidable, blow the surface dry thoroughly and allow adequate drying time. Do not proceed until the sanding scratches are completely dry.
2.3 Degrease with a suitable cleaner and lint-free cloth
After sanding, degrease using a suitable degreaser and a clean, lint-free cloth, following the product instructions. Avoid touching paint-ready areas with bare hands to prevent sweat and fingerprint contamination.
2.4 Control the spraying environment
In humid or rainy conditions, follow the coating manufacturer's booth recommendations. Where appropriate, adjust booth temperature and humidity to reduce condensation on panel surfaces.
3. Repairing Paint Film Blistering
Blistering originates from contamination beneath or within the coating. A simple touch-up will not remove the underlying cause, so the defect is likely to return.
- Remove all paint layers in the blistered area; do not simply sand the blister surface.
- Choose a removal method suited to the substrate and extent of damage, such as dry sanding or an appropriate paint remover. For heavily damaged metal, use a suitable abrasive-blasting process until a clean, sound substrate is exposed.
- Clean and degrease the area, confirm the substrate is dry and free of contaminants, and then refinish in accordance with the product instructions and standard process (body filler → primer → basecoat → clear coat).
Tip: Do not confuse blisters with pinholes. Pinholes usually form during spraying or baking, while blistering often appears after the vehicle has been returned to service. Although blistering may be mistaken for a clear-coat quality issue, this article identifies substrate preparation and moisture in compressed air as important potential causes. Diagnose the actual source before repair.